WHEA Uncorrectable Error : Windows has had a long history of blue-screen error messages, unfortunately. These error screens, commonly known as the Blue Screen of Death, consist of important information regarding the sudden death of your system. Some Windows crash errors are more cryptic than others and hence more difficult to troubleshoot. The WHEA Uncorrectable Error is one of them. When this error occurs, you’ll usually see a message like one of these on the screen: 1) Your PC ran into a problem and needs to restart. We’re just collecting some error info, and then we’ll restart for you.

If you’d like to know more, you can search online for this error: WHEA_UNCORRECTABLE_ERROR. Or 2) A problem has been detected and Windows has been shut down to prevent damage to your computer. There are many reasons why you might get this error on a Windows device, and the solution to fix WHEA_UNCORRECTABLE_ERROR depends on the cause. In this article, we will explain all about WHEA Uncorrectable Error and how to fix the WHEA Uncorrectable Error. We will recommend you to read this post till the end to know everything about Windows UNCORRECTABLE ERROR and to fix it without any assistance.
What Is WHEA Uncorrectable Error?
The Windows Hardware Error Architecture (WHEA) uncorrectable error is a Windows stop code displayed on a blue screen. Typically when this error occurs, your computer will compile some diagnostic data, and then reset on its own. If the root problem continues, your computer will eventually crash again with the same WHEA uncorrectable error message. WHEA uncorrectable errors are ordinarily associated with faulty hardware, but they can also be caused by driver conflicts, overclocking, and missing Windows updates.
WHEA_UNCORRECTABLE_ERROR (Windows stop code 0x0000124) is a hardware error. Voltage issues are a very common cause of this particular Windows error even though they are not often the source of it. The WUE message and 0x0000124 stop code give us an indication as to the nature of the error, but a look at the error dump file will provide further information. Your error dump file (.DMP) is found at C:/Windows/Minidump and will have a timestamp.
Causes of WHEA Uncorrectable Error
- Faulty hardware (Damaged hard drives, GPU, CPU, PSU, corrupt RAM, etc.).
- Heat and voltage issues (Overclocking and voltage changes).
- Driver compatibility issues.
- Damaging Windows system files or registry files.
How To Fix WHEA Uncorrectable Error In Windows 10/8.1/7
In general, you should start by checking for Windows and driver updates, then running checks on components such as your hard drive and memory.
Method #1. Run CHKDSK Command
Prior to making any specific hardware alterations, try running Windows Check Disk from the Command Prompt. CHKDSK is a Windows system tool that verifies the file system and with certain settings, fixes issues as it runs.
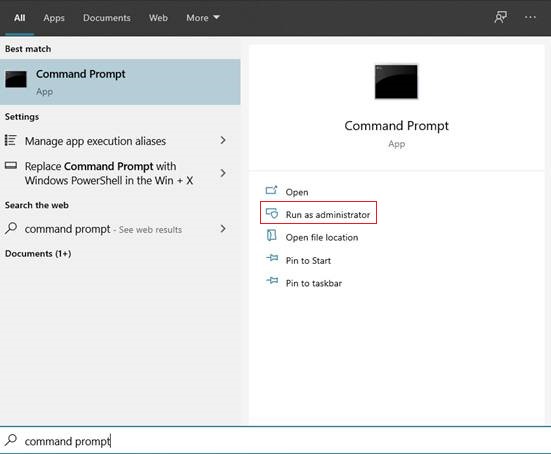
- Type ‘command prompt’ in your Start menu search bar, then right-click the best match and select ‘Run as administrator’.
- Otherwise, you can also press Windows Key + X, then select Command Prompt (Admin) from the menu.
- Next, type ‘chkdsk /r‘ (without quotes) and press Enter.
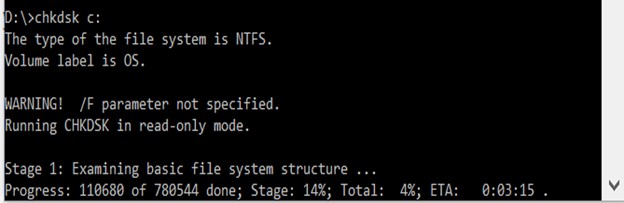
- The command will scan your system for errors and fix any issues along the way.
Method #2. Check Your System Hardware
The WHEA_UNCORRECTABLE_ERROR closely relates to your system hardware. Before progressing with system resets and memory tests, physically double-check your system hardware. Ensure that the cooling systems are fully functioning, your RAM is secure in its slots, and the CPU has through some issues not come loose, and so on.
You can use third-party tools like HWMonitor to monitor the system health and temperature of components. Also, make sure every cable is connected properly to your system. You can also re-plug every device into your machine and check if the issue still persists.

Method #3. Reset System Overclocking
If you have overclocked your system in search of higher speeds, there is a chance that you’ll see the WHEA_UNCORRECTABLE_ERROR. The seamless way to cross this off the list is to reset your system BIOS and remove the effects of any overclocking. You need to enter your system BIOS or UEFI menu.
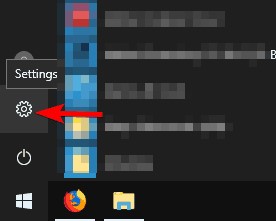
- For this, go to Windows Settings.
- Click on Recovery.
- Under Advanced Startup, click on Restart Now.
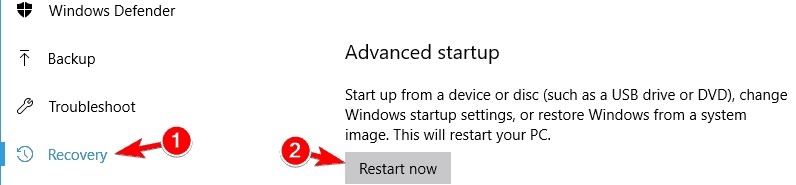
- Your system will restart automatically.
- Keep pressing your BIOS/UEFI menu access key (common keys include F1, F2, F10, DEL, and ESC).
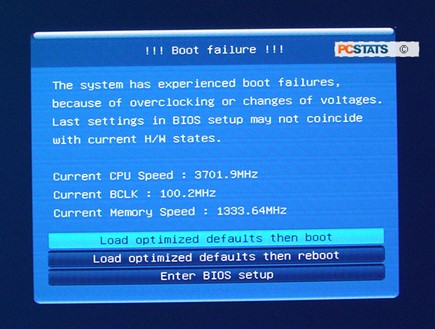
BIOS and UEFI settings vary by manufacturer, but menu titles are usually similar. You have to look for an ‘Overclocking’ option. Most of the time, overclocking options are found under the Advanced option. Go to Advanced Tab -> Performance -> Overclocking
Find the menu and reset your overclocking options. Simply, disable the Overclocking settings, save changes using F10 Key and restart your device to make changes. Resetting will return your system to its out-of-box state, but could also remove WHEA_UNCORRECTABLE_ERROR in the process.
Method #4. Reset Your BIOS/UEFI Settings
If you’re clearing your BIOS/UEFI overlock settings, try to reset your entire BIOS. Somewhere in the BIOS menu, there is an option to complete a full BIOS settings reset or load the default BIOS setup. Find the option and click on it. Here’s how you can do it:
- Turn off your device and re-start it.
- Keep pressing the DEL key until the BIOS Settings appear.
- In BIOS settings, navigate to the EXIT tab.
- Select Load Default Configuration option.
- On the pop-up, select Yes.
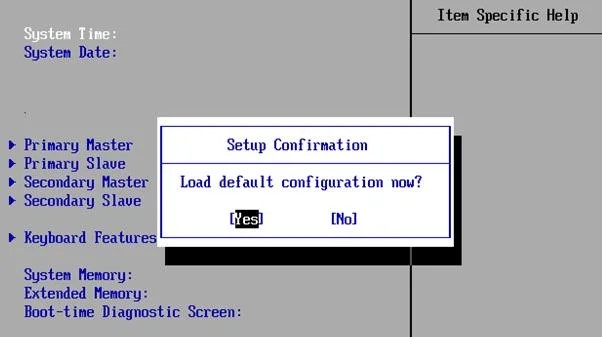
Your system will restart and the WHEA uncorrectable error message will not appear on your screen. A lot of people out there were able to fix WHEA uncorrectable error Windows 10 error by following this method.
Method #5. Update BIOS/UEFI Settings
Now, this step also varies heavily depending on your system’s motherboard manufacturer. Some BIOS/UEFI settings can automatically download and update using a desktop utility. Other manufacturers require you to download the BIOS update and flash the firmware yourself. If you’re unsure of what kind of motherboard you have, then download and run CPU-Z. Open the Mainboard tab and find your motherboard manufacturer and model. You can find your BIOS brand and version on this tab, too.
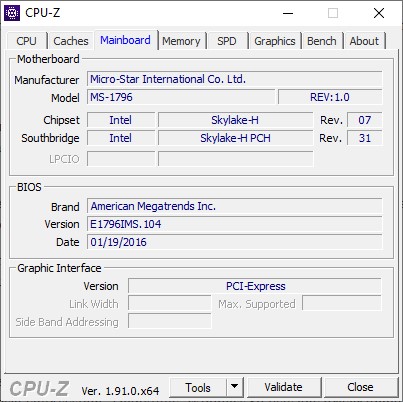
After knowing your motherboard type, complete an internet search for “[your motherboard manufacturer + model] bios update.” For example, “Micro-star ms-1796 bios update” if your system manufacturer is Micro-star. You will find instructions, tutorials, and even a few videos if you get lucky.
Method #6. Check/Update Device Drivers
It has been seen that many times, new drivers could harm your system. In this era, it is becoming rarer as Windows 10 handles most driver updates. However, a dodgy driver can still upset your system if given the chance. Gratefully, Windows 10 lists any driver updates in the Windows Update section (Windows Update can also cause its own errors), so you can rapidly figure out where the issue stems from.
- Press Windows Key + I to open the Settings panel.
- Then select Update & Security > View Update History.
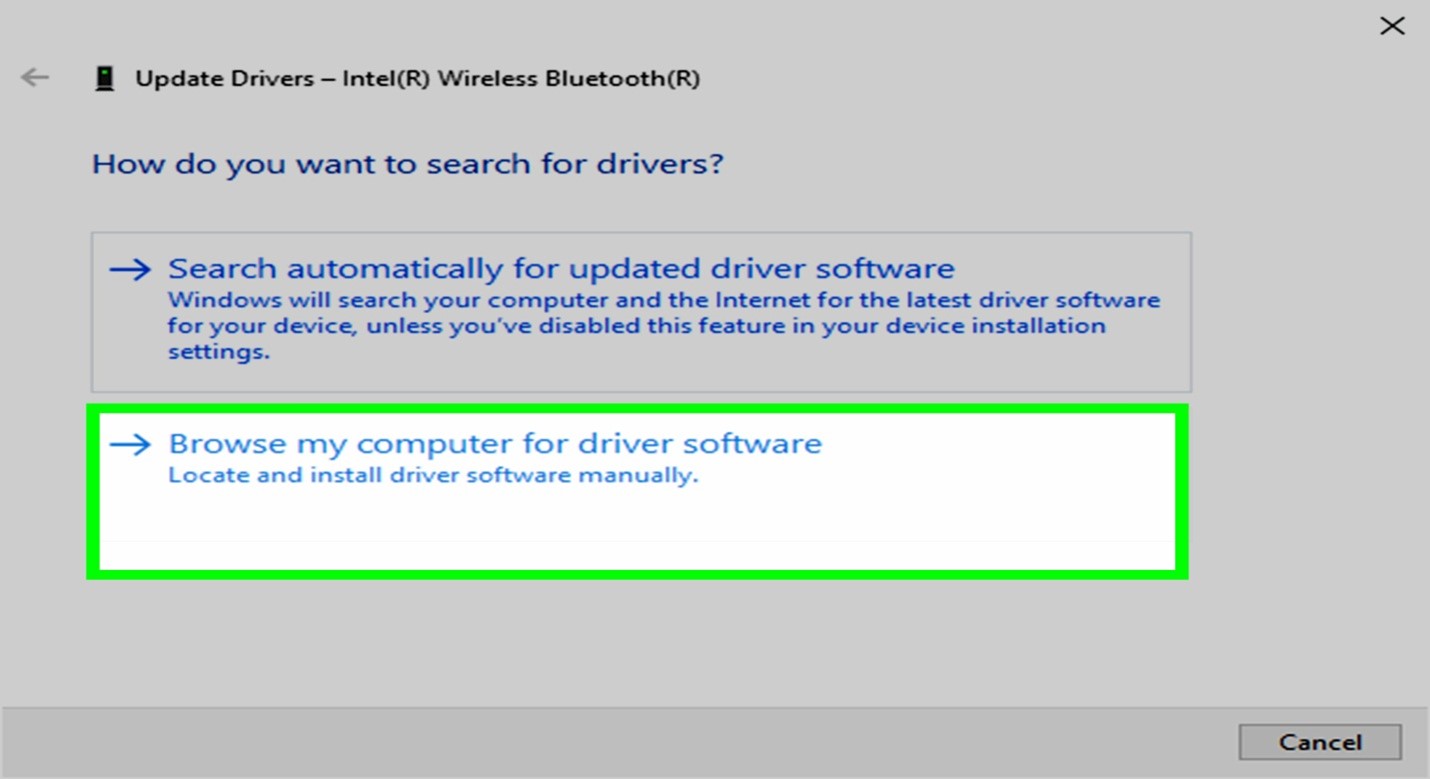
You can find any driver updates here. Now, type device manager in the Start menu search bar and select the best match. Head down to the list and check for an error symbol. If there’s nothing, your driver status is unlikely to be the source of the issue. As a matter of fact, you can use a third-party tool to update all of your system drivers simultaneously.
Method #7. Run A RAM Health Check Using MemTest86
Windows has an integrated memory checker, called Windows Memory Diagnostic. But sadly, it doesn’t have a great reputation and regularly misses issues found using another excellent tool: MemTest86. MemTest86 is a free, standalone memory testing tool for x86 machines. You boot MemTest86 from a USB flash drive (or bootable disc) and leave it to check your system RAM. Nowadays, a MemTest86 RAM check takes a long time to complete; a single pass takes hours depending on the amount of RAM you have installed.

To get the full MemTest86 experience you should run at least two passes, that is, two complete cycles. Nonetheless, by most reports, MemTest86 should expose a serious RAM issue after a short amount of time. Go to the MemTest86 download page and download the Image for creating a bootable CD (ISO format). Next, you need to write the MemTest86 ISO to a USB flash drive.
Burn MemTest86 using the tool of your choice, then shut down your system. Reboot the system while pressing the button for your Boot Selection menu (usually F10, F11, DEL, or ESC), then select the bootable MemTest86 USB flash drive. The memory test will start automatically. If it does return RAM errors, complete an internet search for the error code and type to discover your next course of action.
Method #8. Reset Your Windows
The last step; if all the above-mentioned things fail, you can use the Windows 10 Reset function to refresh your system. Windows 10 Reset replaces your system files with a completely fresh set of files and will theoretically clear any lingering issues relating to WHEA_UNCORRECTABLE_ERROR all the while keeping the majority of your important files intact.
- Head to Settings.
- Update and Security -> Recovery.
- Then under ‘Reset this PC’ select ‘Get Started.
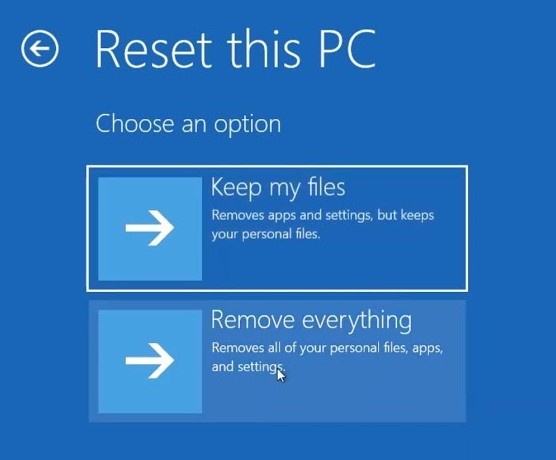
Your system restarts the second you hit the button, so make sure you backup any important files beforehand. Your system will restart, then you may select Keep my files or Remove everything, whichever suits you.
Final Words
It’s a universal truth that bluescreen errors are frustrating. And they become a pain in the arse if you genuinely don’t have a clue which piece of hardware is causing the issue. The fixes mentioned above will fix your WHEA error, but take care of your hardware, as it can come back.
The WHEA uncorrectable error is in fact just one of the many errors that can cause Windows to display the infamous blue screen of death. By following the methods mentioned above, you will be able to fix WHEA UNCORRECTABLE ERROR on Windows devices, still you can ask us for help via the comments below.